|
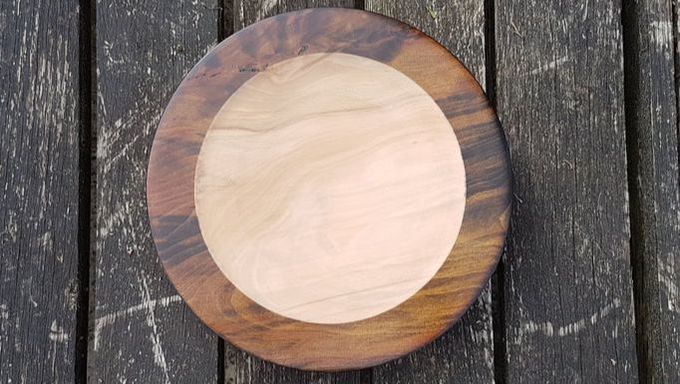
My last two videos have used the same colouring technique - working from darker stains to lighter ones, with sanding between coats. I hadn't intended to do the same technique twice, but after I had done it the first time with spirit stains from Chestnut Products, I was asked about using water-based stains - Intrinsic Colours from Martin Saban-Smith. So I made a second video using the Intrinsic Colours. I used the same blank for both media - with the result that there isn't a shot of the two platters to make any comparisons...so here are some shots of the spirit stain version alongside the water-based version. Both versions were finished with a coat of Chestnut Products' Acrylic Sanding Sealer and then three coats of Chestnut Products' Acrylic Gloss Lacquer. Spirit stains on the left, Intrinsic Colours on the right. Hope this is helpful.
0 Comments
Well, my head is certainly spinning this week. It was such a thrill to get this month's Woodturning magazine with some of my work featuring in it. I'd love to know what you thought of it if you have seen it...if you haven't, it's in the shops now! 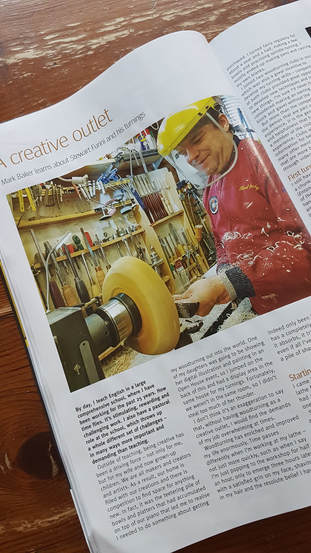 I hope there'll be an opportunity to do some more writing, and share ideas about colouring and texturing wood, though I also do 'normal' turning as well.
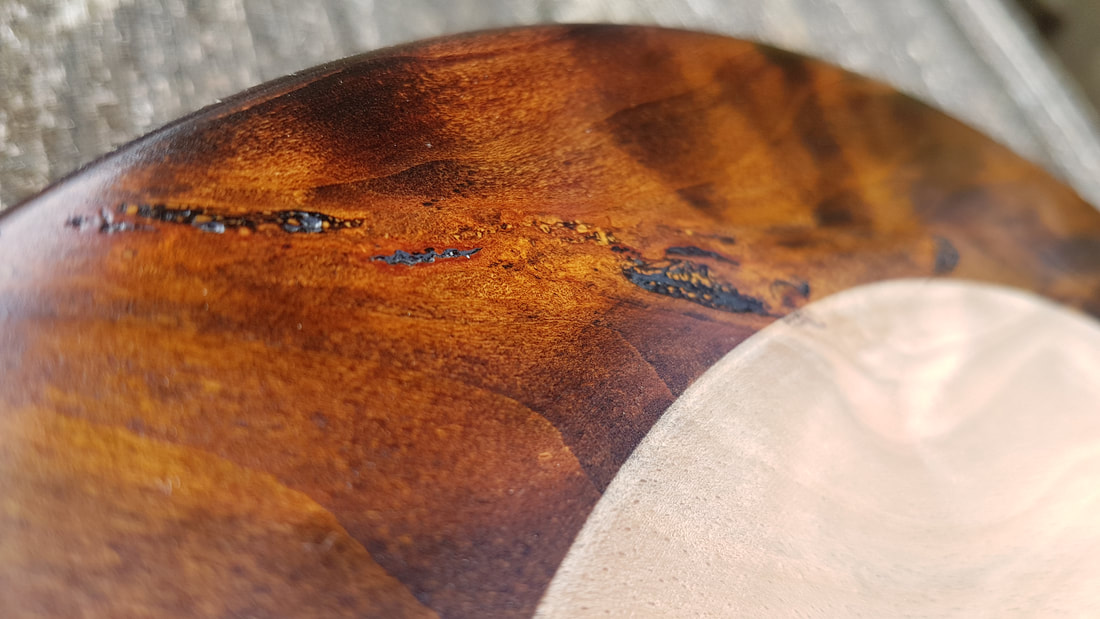
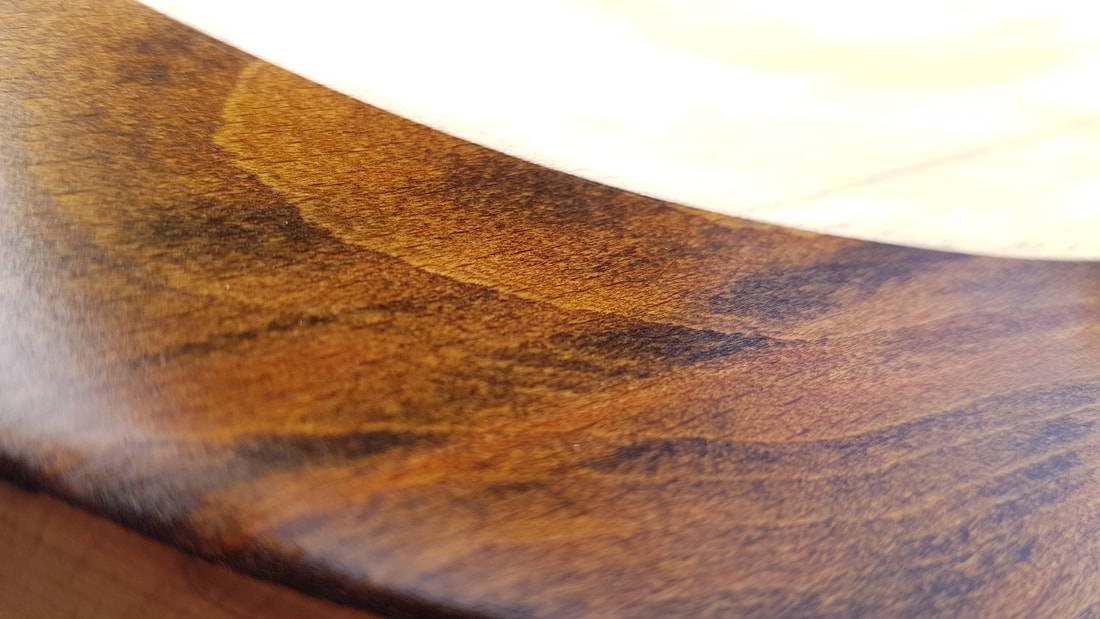
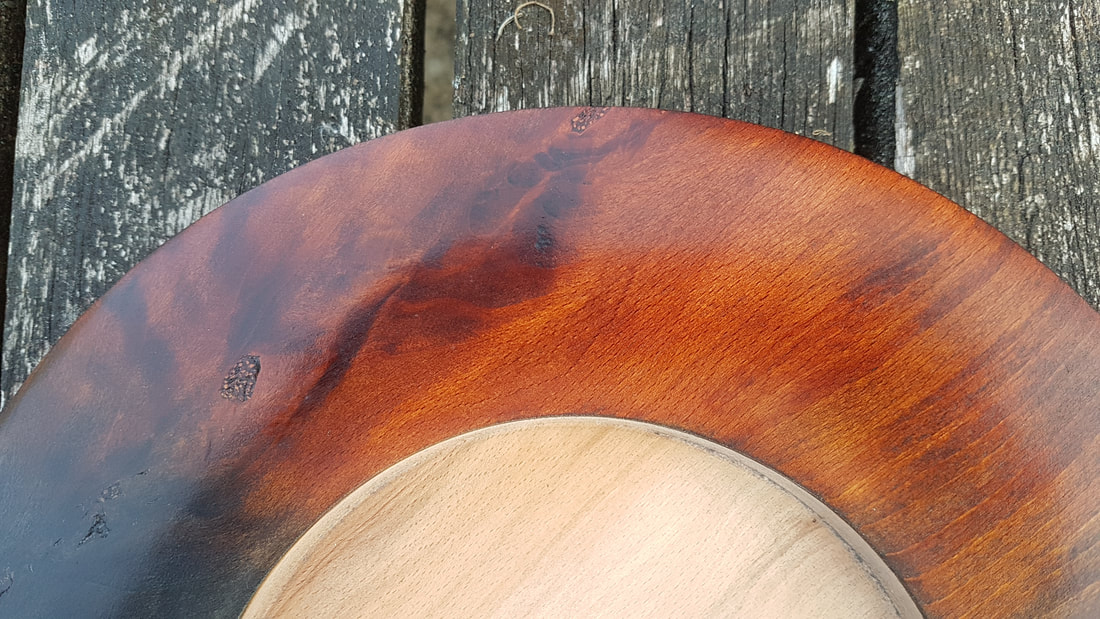
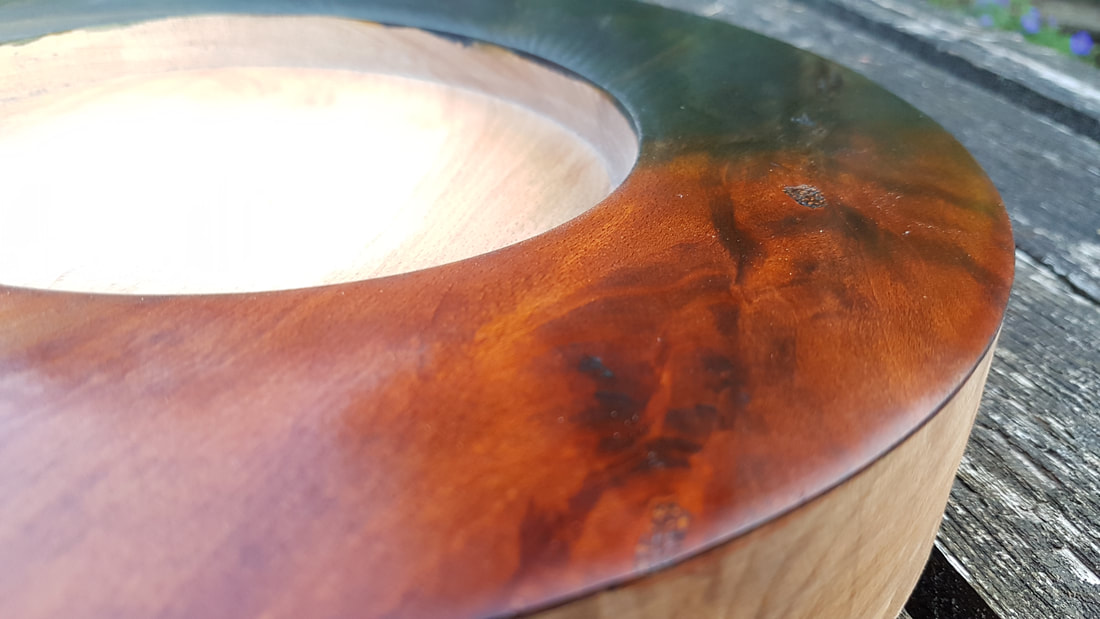
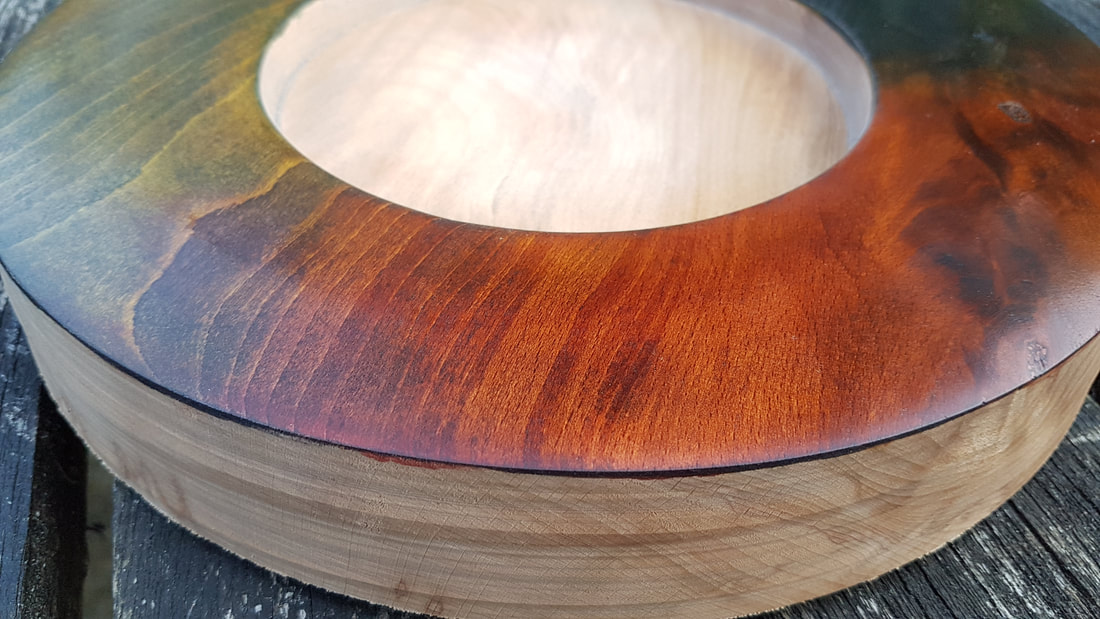
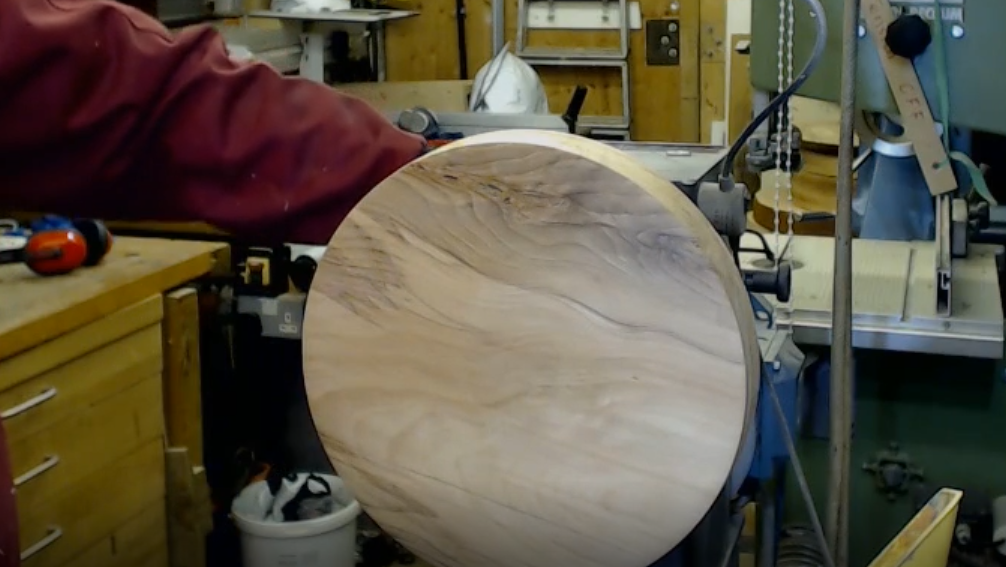
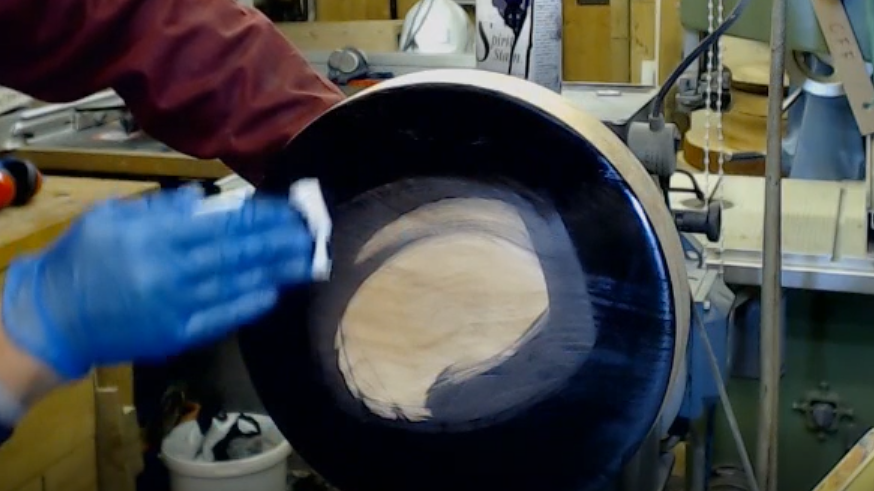
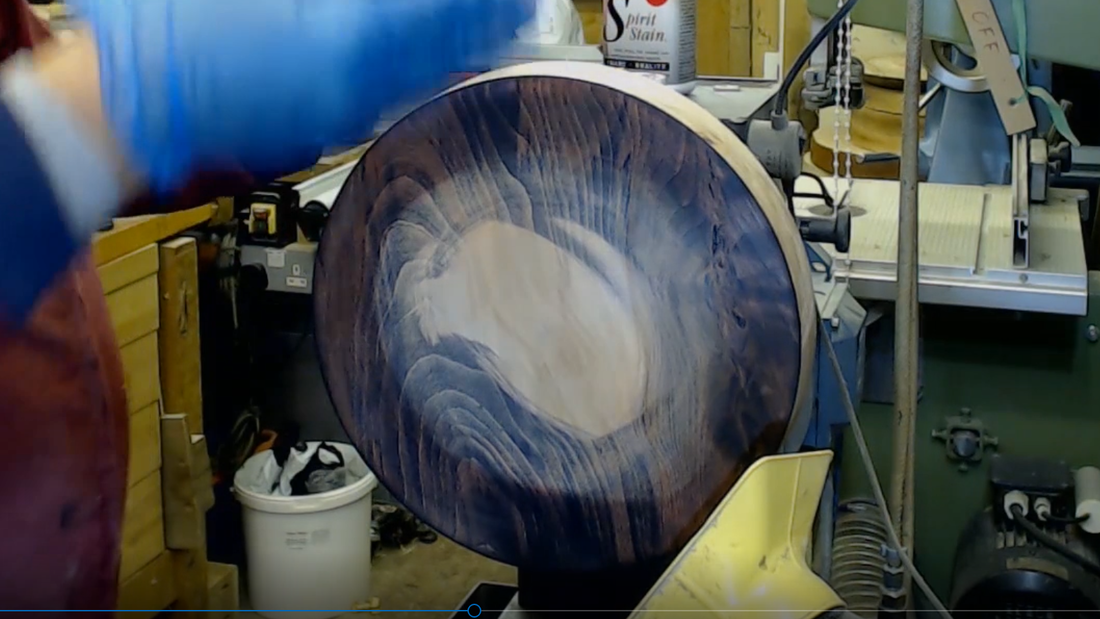
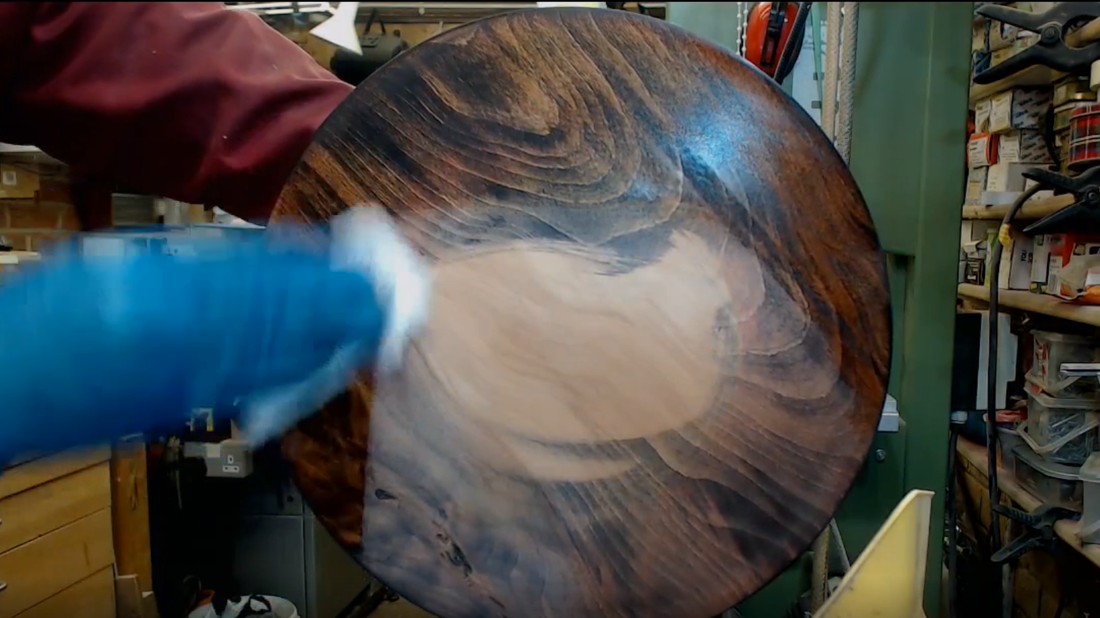
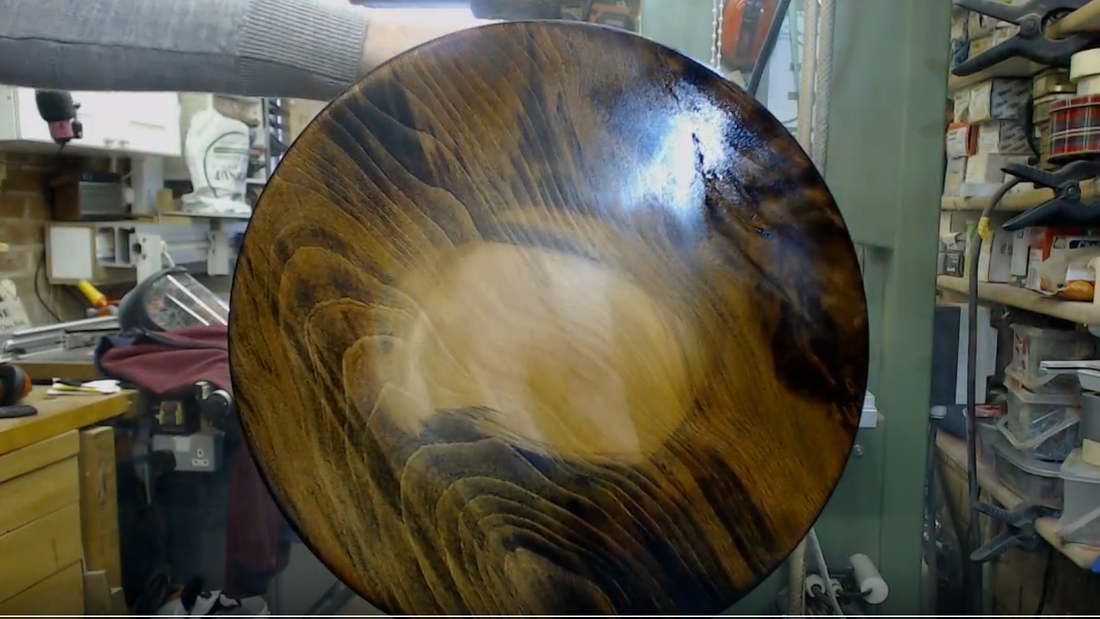
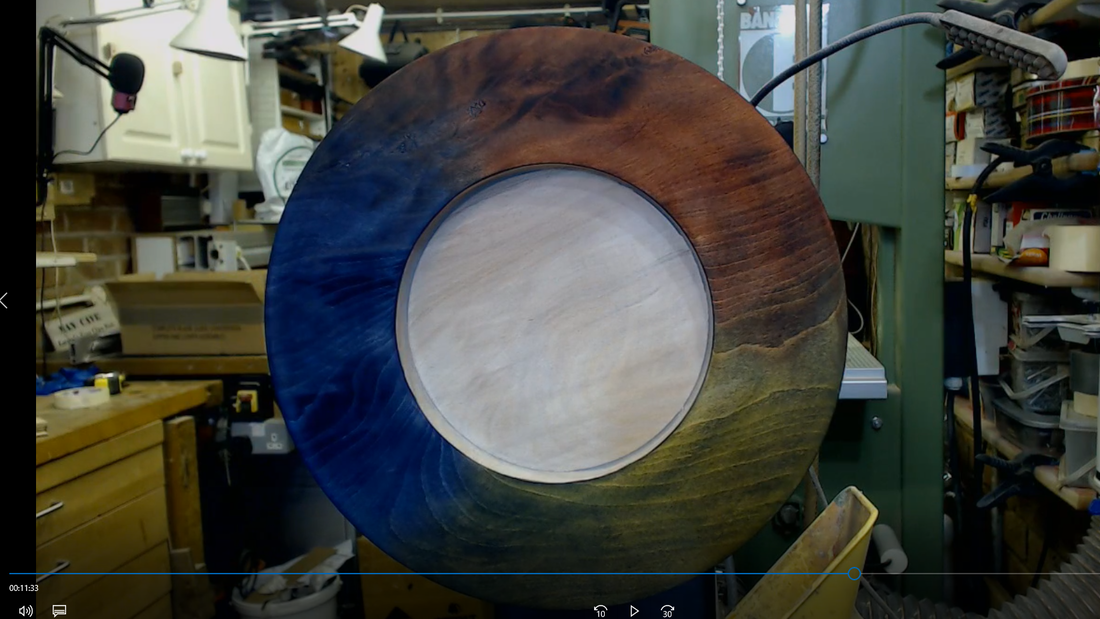
My next club competitions are coming up, so expect to see some videos soon that aren't about platter rims! One competition piece has to contain part of a natural edge, the other is a three-cornered bowl. It was great this week to watch John Plater demonstrate some variations on three-cornered bowls which has got me thinking about my design. No doubt there'll have to be some practice pieces as I've not done a three-cornered one before. I'm giving serious thought to doing some piercing and colouring to it as well... I've finished off the latest video and it was posted on YouTube earlier this evening - it's the same technique as the previous video, but with Intrinsic Colours instead. The video can be seen here. I had been hoping to get down to Yandles yesterday for their September show, but it didn't work out. I'll have to wait for next April. However, there is the AWGB seminar coming up - I'm hopeful of getting to the Saturday sessions. I haven't been to one before, so I'm looking forward to it. It starts on Friday 5th October and ends on Sunday 7th October. It's been good to get back in the shed this week after my summer break in Italy and Austria. My latest video is up on YouTube and I've been filming again today for a follow-up video which I hope will be finished in a few days' time. Sometimes, I intend to colour a piece of wood only to find that the grain is lovely and that colouring with an opaque finish would really not be the kind thing to do to the piece of wood. I do have some sensibility left for appreciating wood in its natural beauty. This is what my latest video covers - adding colour to wood but allowing the grain to show through. Of course, a wash of colour or stain could be applied, but that would only change the colour of the rim. This approach, I believe, enhances the grain and figure of the wood by increasing the contrast. The process is simple - prepare your piece of wood by sanding the surface to 320 grit. Then cover with black stain. In the video I use Chestnut Spirit Stains. I'm working on the follow-up video by using Hampshire Sheen's Intrinsic Colours. Sand back the black stain to leave about 30% of it. If you want it darker, repeat the process with black stain. Then apply a second colour. I used red. Sand this back and finally add a third colour. In my case, I used yellow. The principle is that the colours used get lighter. This really brings the grain to life. Hopefully, the pictures show this. You can, of course, use different colours and get a completely different effect. I think this is the closest finish I've done to something that looks naturally like wood.
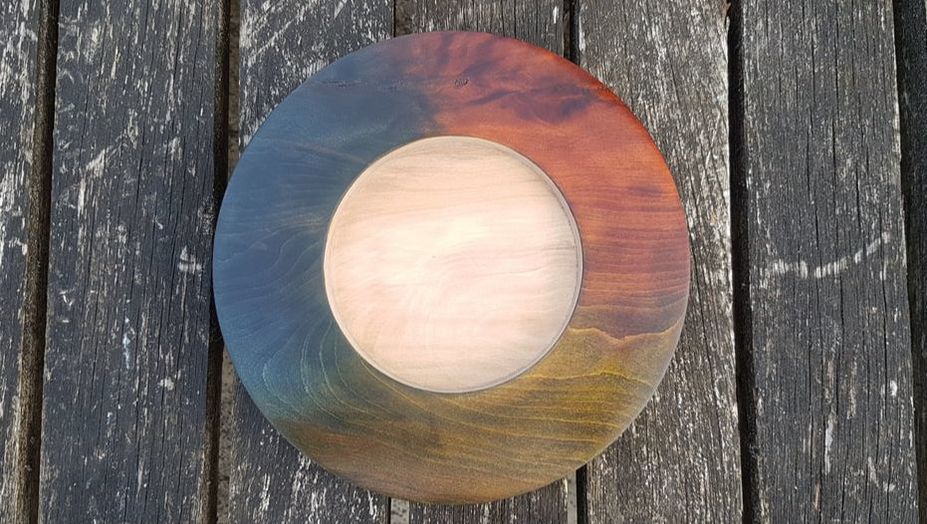
The build up of the layers of stain helps to seal the wood and allows the later layers to build up in shine and brightness. The first layer of black soaks into the more porous parts of the grain where it remains after a light sanding to remove the majority of the black. I have tried this on less figured grain, but the effect is not very pleasing. I think it works much better on wood where there is some swirl and movement in the grain. I hope the pictures show how the technique brings out a stronger contrast in the grain. When I posted the video of this process on YouTube, I was asked why I had used spirit stains rather than water-based stains. The reason is that I have always done colouring with spirit stains since I saw a demo by Terry Smart from Chestnut Products over 5 years ago. After posting colouring videos on the internet over a few months, Terry was kind enough to supply me with some more spirit stains and lacquers. I like using them for their ease of application and the vividness of the colours. However, there is nothing to stop you using whatever stains you want. Martin Saban-Smith sent me a sample set of Intrinsic Colours to try, and I'm using them with this technique for my next video. So keep an eye on my YouTube channel if you want to see the difference. I think I'll also try this with acrylic paints mixed with a transparent medium. I sense a common colouring theme emerging! I'll finish this section with screenshot from the video footage of the rim coloured with the Intrinsic Colours. This hasn't had any finish added yet. I also tried three different colour combinations to get more experience with using the colours.
|
Stewart is...Keeping sane and finding creative expression in a piece of spinning wood Archives
April 2022
Categories |

 RSS Feed
© 2017-2024 Stewart Furini Woodturning. All rights reserved.